
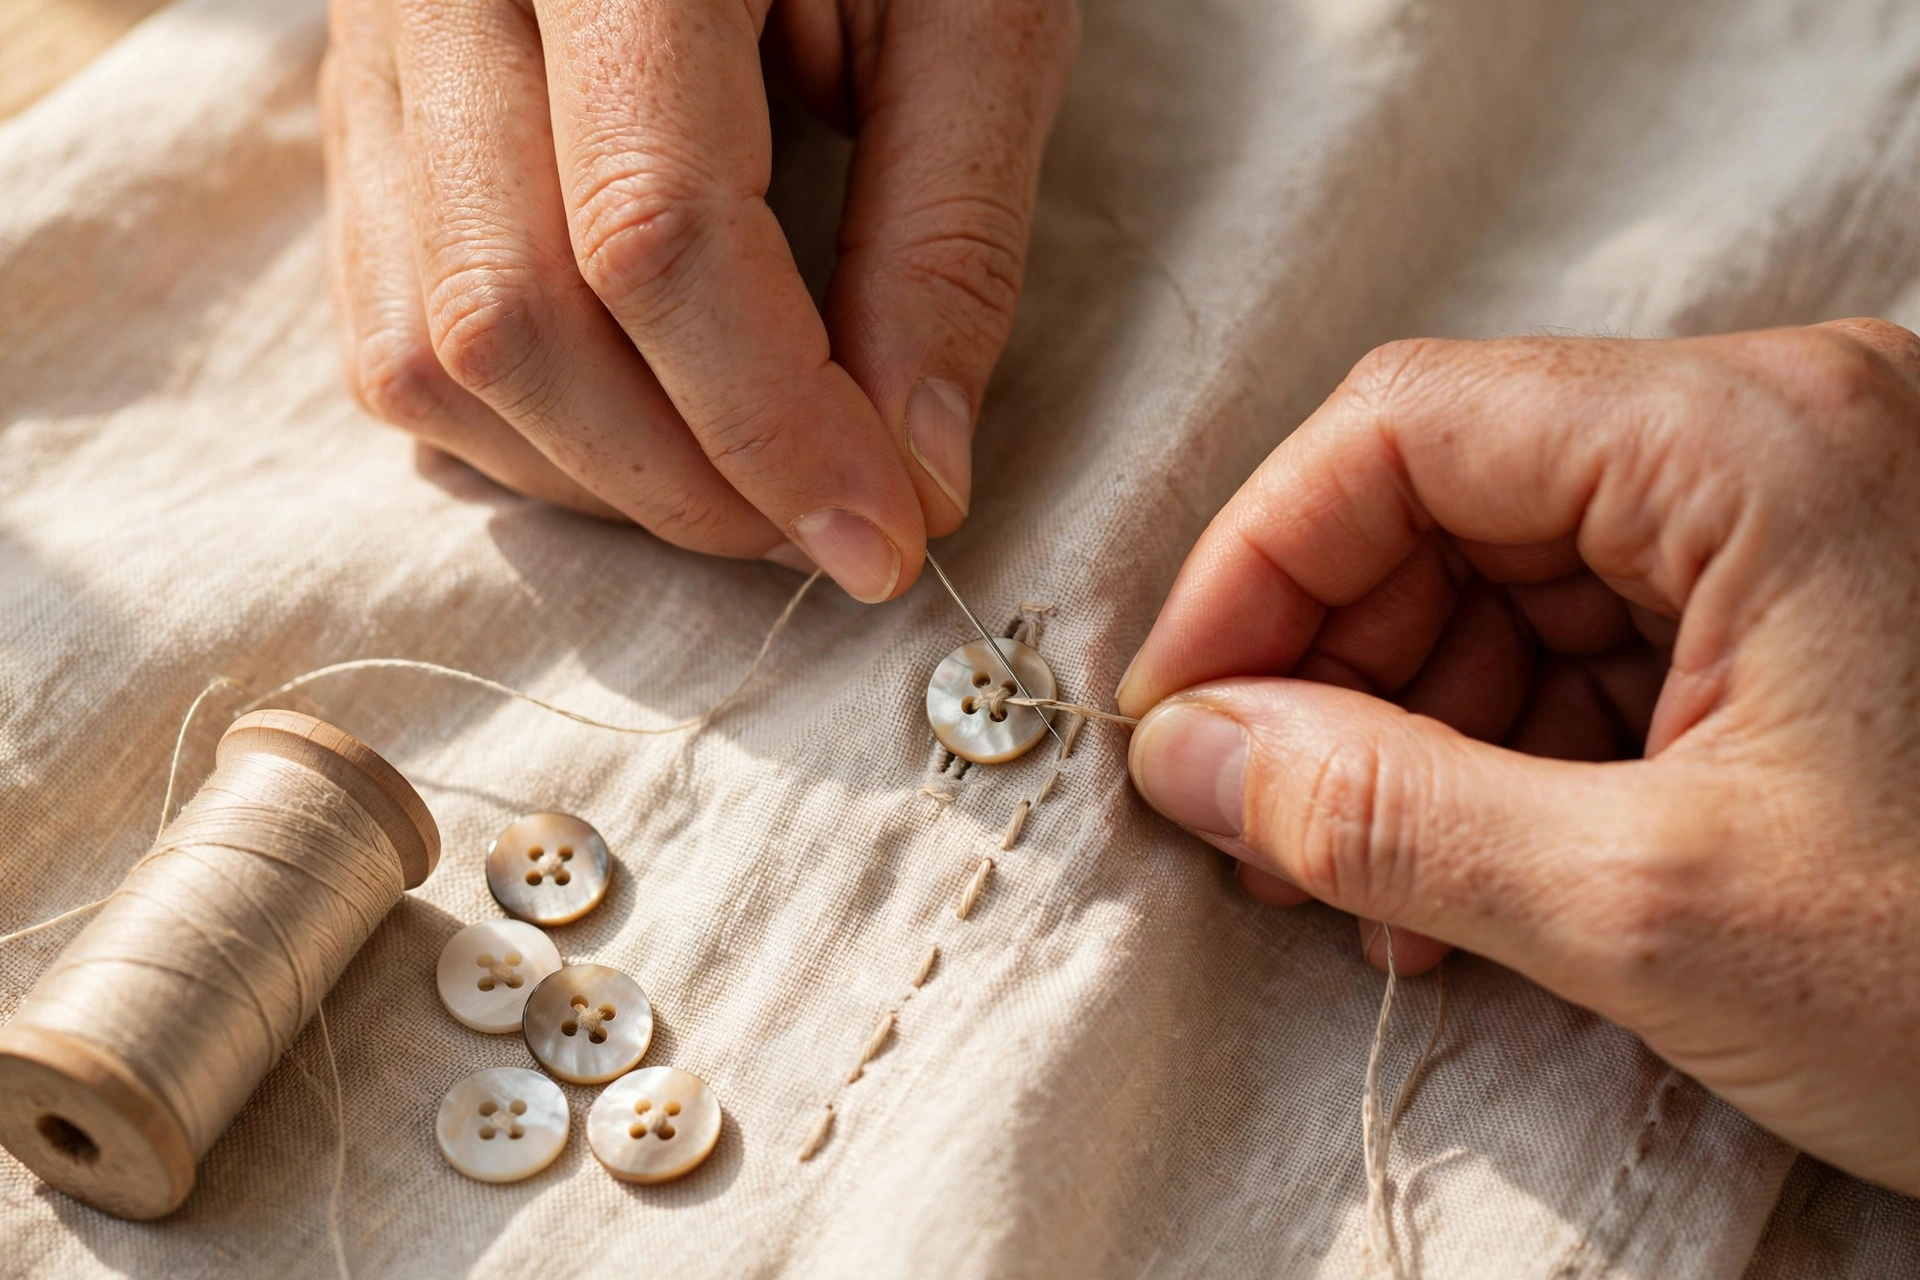
How to Sew a Button (That Actually Stays On)

What You Need
You need very little: a hand-sewing needle, all-purpose polyester thread in a matching color, the spare button (or a matching replacement), small scissors, and a toothpick or pin to use as a spacer. Match the thread to the button, not the fabric, so the stitches disappear against the button itself. Cut about 45 cm of thread. Longer thread tangles and knots while you work, which is the most common beginner frustration.
Step 1: Thread and Knot
Thread the needle, pull the thread through until you have two equal lengths, and tie the two ends together with a small knot. Double thread is stronger than single thread and fills the button holes faster. If your knot keeps slipping through the fabric, wrap the thread around your finger once more and tie a second knot on top of the first. A knot that is too small is one of the three reasons buttons fall off, covered below.
Step 2: Position and Mark
Button the garment and mark exactly where the button should sit, using a pin or a tiny chalk dot. Line the button up with its buttonhole on the other side. A button sewn even a few millimetres off makes the garment pull sideways and strains the stitches every time you wear it. If you are replacing a button, the old stitch holes usually show you the exact spot.
Step 3: Sew a 4-Hole Button
Push the needle up from underneath the fabric through one hole, lay the toothpick across the top of the button, and push the needle down through the diagonally opposite hole. The toothpick holds a gap between the button and the fabric. Repeat this 6 to 8 times, alternating between the two diagonal pairs, keeping the stitches even and snug but not tight. The toothpick is doing an important job, explained in Step 5.
Step 4: Sew a Shank Button
Shank buttons have a small loop or stem on the back instead of holes through the face. Push the needle up from underneath, pass it through the shank loop, and push it back down through the fabric right beside where it came up. Repeat 6 to 8 times. Because the shank already holds the button away from the fabric, you do not need the toothpick for this type.
Step 5: Build the Thread Shank and Knot Off
Remove the toothpick. You now have a loose gap between button and fabric. Wrap your thread tightly around the stitches under the button 5 to 6 times to form a firm little stem, called a thread shank. This stem is what lets the button sit neatly inside its buttonhole without pulling the fabric. Push the needle down to the underside of the fabric, loop the thread around the needle to form a small knot, pull it tight, and repeat once. Trim the thread close to the knot. Done well, this knot is invisible and the button will survive dozens of washes.
Shirt Buttons vs Coat Buttons
The method is the same, but the materials change with the garment:
| Feature | Shirt Button | Coat Button |
|---|---|---|
| Size | Small, usually 10 to 15 mm | Larger, usually 20 to 28 mm |
| Thread | Standard all-purpose thread | Heavier button thread or doubled all-purpose thread |
| Shank | Small thread shank is enough | Taller thread shank, so the thick fabric layers close under it |
| Stitches | 6 to 8 passes | 8 to 10 passes for extra strength |
3 Mistakes That Make Buttons Pop Off
1. Skipping the thread shank. A button sewn flat against the fabric cannot move, so every buttoning strains the stitches until they snap. Always build the shank.
2. A knot that is too small. If the knot pulls through the fabric, the whole job unravels. Double the knot, and on loosely woven fabric, sew over a tiny scrap of fabric or a small spare button on the underside as an anchor.
3. Thread that is too long or too weak. Long thread tangles and weakens as you pull it through. Cotton thread snaps sooner than polyester. Keep it short, doubled, and polyester for everyday repairs.
When to Sew vs Replace
Sew when the button itself is fine and only the thread gave way. Replace when the button is cracked, chipped, or missing a piece, when its color has faded badly against the garment, or when the fabric underneath is torn. A torn button area needs a small patch behind it first, or the new button will pull straight through the same weak spot.
Wardrobe Fixes That Go Together
A loose button is often the first sign your fit needs attention. If your clothes pull or gap at the bust, start with our guide to dressing for your body type, check that your measurements are right with how to measure bra size, and see the full approach in how to dress for your body type. Small repairs and right fit together make a wardrobe feel new again. Back to the homepage for more guides.
Frequently Asked Questions
How long does it take to sew a button?
About 5 minutes once you have needle and thread ready. Your first button may take 10 minutes. The knot and the thread shank take most of the time, and both get faster with practice.
What thread should I use for a button?
All-purpose polyester thread in a color matching the button, doubled. Polyester is stronger than cotton and survives washing better. For heavy coats, use button thread or double your all-purpose thread.
Why does my button keep falling off?
Almost always one of three reasons: no thread shank, a knot too small that pulls through the fabric, or thread that was too long and weakened while sewing. Fix all three and the button stays on.
What is a thread shank and why does it matter?
A thread shank is the wrapped stem of thread between the button and the fabric. It gives the button room to sit inside its buttonhole without pulling, which stops the stitches from straining and snapping.
Can I sew a button without a needle?
Not properly. Fabric glue or iron-on tape can hold a button for one wear in an emergency, but neither survives washing. A needle and thread is the only lasting fix, and it costs almost nothing.
How is a shank button different to sew?
A shank button has a loop on the back instead of holes through the face. You sew through that loop 6 to 8 times and skip the toothpick, because the shank already holds the button off the fabric.
Should I use a toothpick or a pin as a spacer?
Either works. A toothpick is easier to grip and gives a slightly taller shank, which suits shirts. A pin gives a shorter shank for thin fabrics. Remove it before winding the thread shank.
When should I replace a button instead of sewing it back?
Replace it when it is cracked, chipped, badly faded, or missing, or when the fabric underneath is torn. Torn fabric needs a small patch behind it first, or the new button will pull through the same weak spot.
3 Comments
Comments are closed.